Floating Parts: Solid or Hollow? A Buoyancy and Lightweight Design Guide
PP is only 0.90 in density and lighter than water, so for a floating part, can I just print it 100% solid and be done with it?
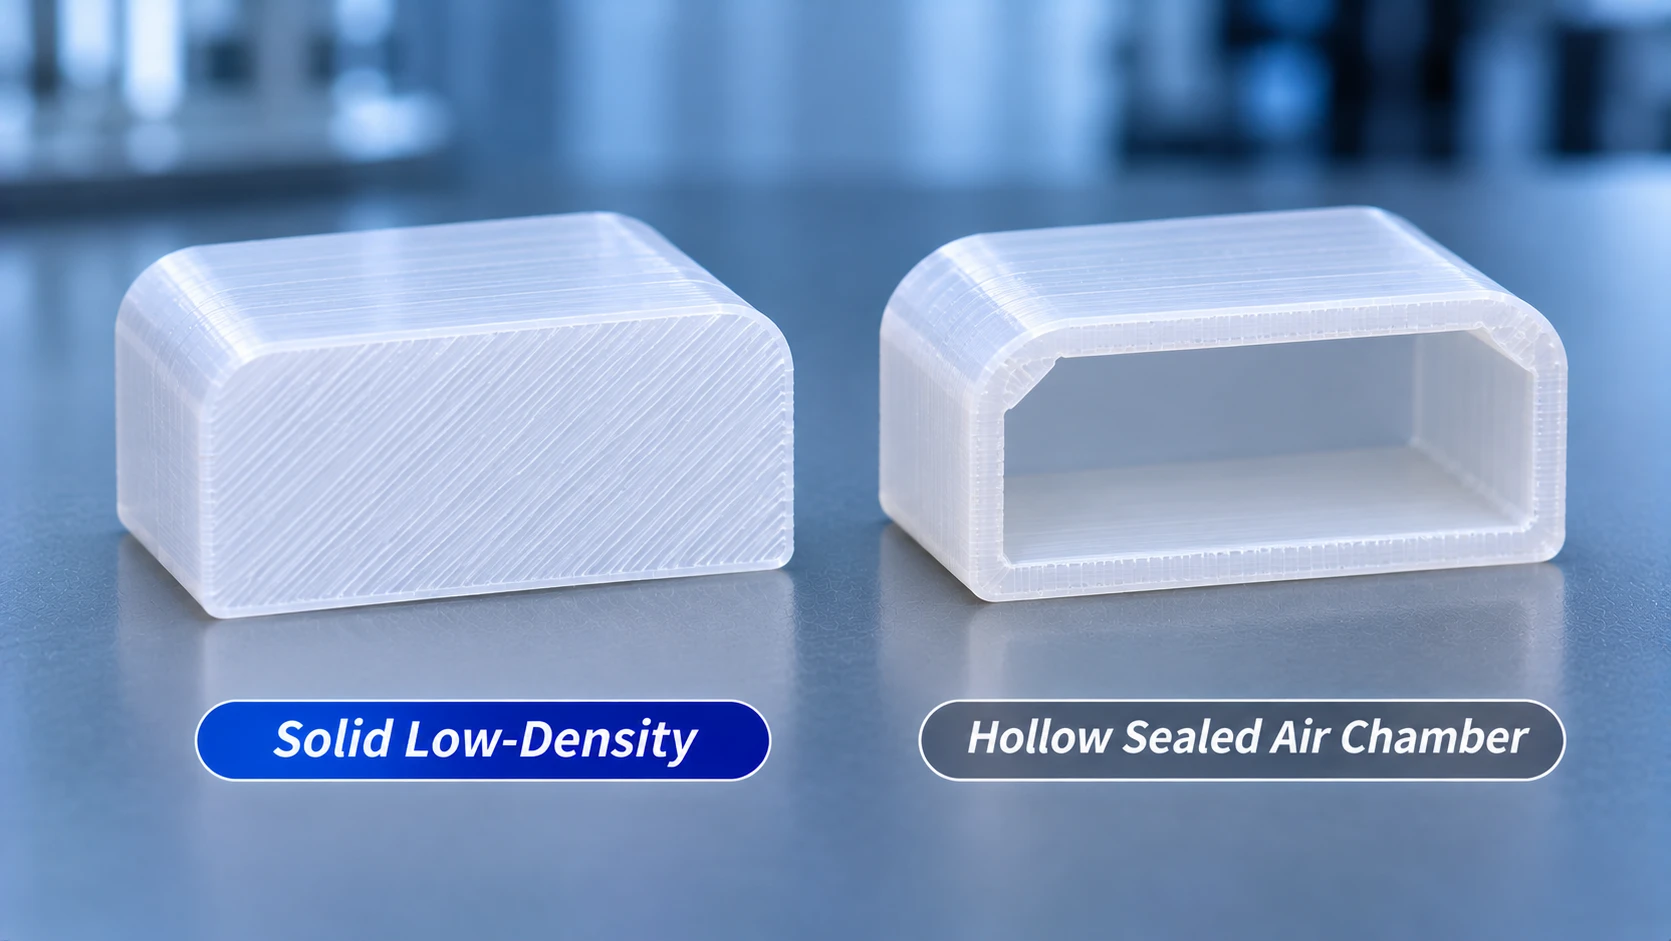
Solid indeed keeps water out, but if the part must carry real load (a bait boat, or drone floats, for example), fully solid may be too heavy and short on buoyancy. What you need is the “sealed air chamber” design.
Two common design approaches:
Approach 1: solid print with low infill (for small, simple parts)
How to do it: model it solid, then set 15%-20% infill in the slicer and let the walls handle waterproofing and structure.
Pros: simplest to design, with no need to hollow anything in CAD.
Risk: if the wall is ever damaged, water that seeps in fills the internal infill lattice and is very hard to drain, so the part comes out heavier and loses buoyancy on the next use.
Approach 2: hollow air-chamber design (for large parts and maximum buoyancy)
How to do it: while modeling, turn the part interior into one or more fully enclosed hollow air chambers. Leave enough wall thickness and keep the interior unfilled.
Pros: maximum buoyancy. For the same volume, a hollow structure displaces more water and can carry heavier loads.
Key challenge: keeping the chamber absolutely leak-free. The shell must print very dense, and the interior must have no opening connected to the outside.
Summary:
How to test whether your design is good enough?
For small buoys or water toys, solid with thick walls is enough. For load-bearing floats, design enclosed independent chambers inside first.
The simplest way to test a design is the “squeeze test”: push the hollow part deep underwater and squeeze hard while watching for air bubbles. No bubbles means the seal passes; bubbles mean the model leaks or the wall is too thin.