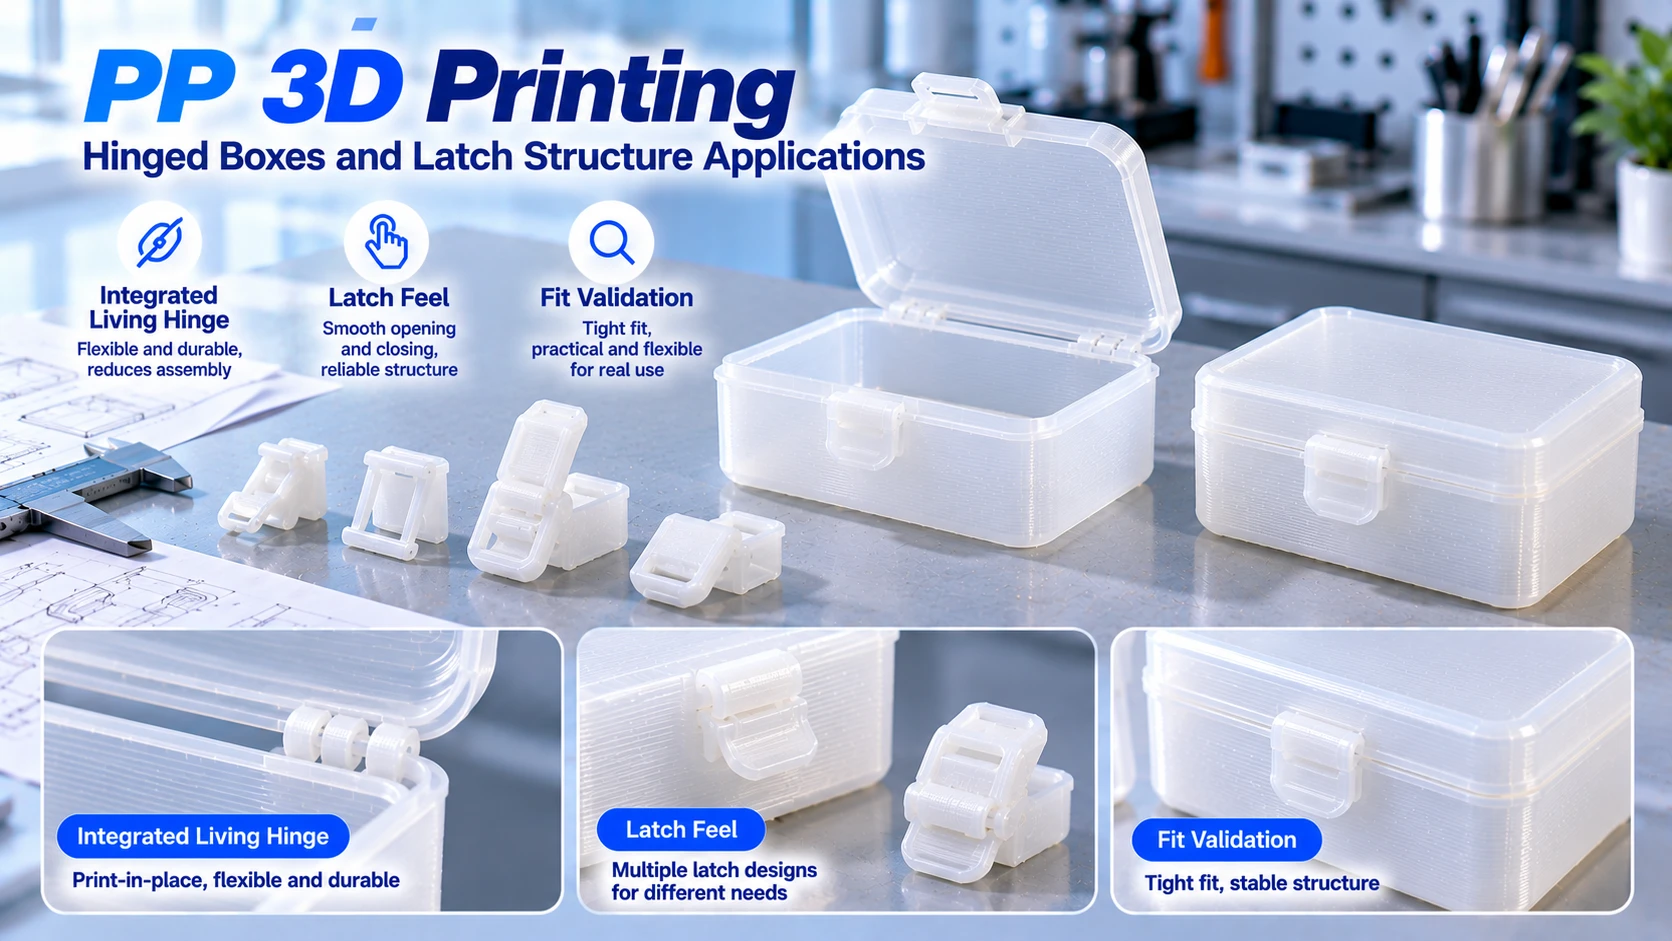
Can 3D Printing Make Packaging Prototypes? Clamshell Boxes, Snap Fits and One-Piece Molding
Packaging development is not just about verifying appearance; you must also confirm the opening feel, snap-fit force, lid fit and internal positioning structure. For flip-top boxes, snap boxes and integrally molded storage packaging, 3D printing turns a design into a physical part quickly, so these details can be verified before tooling.
Polypropylene (PP) has a degree of toughness, making it suitable for trying designs such as snaps, flexible connections and living hinges. Using PP filament to print packaging prototypes lets designers compare different structural schemes, check actual assembly results, and then adjust the model based on test findings.
1. What Is Most Worth Verifying Early in Packaging Development?
Drawings and 3D renderings can show packaging appearance, but they struggle to accurately convey snap tightness, the flip-top bending feel, or whether the lid seam is even once closed.
For example, a flip-top box may look good, yet open poorly, snap too tight, or close unevenly. Such problems are only found after the mold is done, and fixing the structure then adds development cost and lead time.
3D printing brings these verification steps forward. Designers can first make a sample, check the actual assembly, then adjust the model and print a new version.
Packaging prototypes typically focus verification on these details:
- Opening feel: whether the flip-top moves smoothly and the opening resistance is appropriate.
- Snap-fit force: whether it snaps comfortably and is easy to open.
- Lid seam: whether the gap is even after closing and the edges interfere.
- Internal positioning: whether the product sits stably and is easy to remove.
- Structural durability: whether the living hinge and snap show noticeable change after repeated operation.
These details directly affect the packaging user experience and are the most valuable things for a 3D printing prototype to verify.
2. Three Structural Highlights of PP Printed Packaging Prototypes
1. Living Hinge: Explore Integrated Flip-Top and Box Molding
A living hinge connects the flip-top and the box body through a flexible section, eliminating separate hinges and assembly parts.
PP is commonly used in plastic products with flexible connections, so it is worth trying for integrated flip-top packaging prototypes. With 3D printing, you can compare how different hinge thicknesses, widths and connection shapes affect bending behavior.
A living hinge’s real performance depends on the material, structural dimensions, print orientation and interlayer bonding. Injection-molding hinge design experience cannot be directly equated with FDM print performance. Prototype testing should watch the hinge’s bending state and durability.
2. Snap Fits: Compare the Snap Feel Through Structural Adjustment
Snap fits are among the structures in packaging prototypes that are well suited to 3D printing verification.
PP’s toughness makes it worth trying for elastic snap fits. Designers can adjust the snap arm’s thickness, length, fillet and engagement position to compare the deformation behavior and assembly experience of different structures.
Too tight and assembly is hard; too loose and the closure is unstable. Printing several structural versions for comparison makes the snap performance easier to judge directly.
Snap durability is also affected by material formulation, print orientation, interlayer bonding and actual load, so a single successful snap should not be the sole basis for judging long-term performance.
3. Box Body and Lid: Verify the Seam and Overall Structure
Flip-top and snap boxes usually must balance box rigidity, lid fit, and the dimensional mating of the connection structure.
3D printing helps designers check whether the box corners, edges and snap locations interfere, and makes it easy to compare how different wall thicknesses and connection dimensions affect the overall structure.
Large flat areas and rectangular box bodies can warp during printing, affecting lid-to-body fit. Dimensional design and print stability must be considered together; you cannot judge the final seam from the theoretical gap in the model alone.
3. Printing and Design Points for PP Packaging Prototypes
1. Choose Print Orientation Based on Box Structure
For common box structures, consider printing opening-up first to reduce some overhang structures and internal support needs.
The specific orientation depends on the box geometry, living-hinge position, snap structure and the printer’s actual capability. For hinges or elastic snaps that bend repeatedly, you must also factor in the load direction and assess how print orientation affects interlayer bonding and structural performance.
2. Control Warping of Large Flat Areas
Packaging boxes usually have large flat areas and relatively regular edges. If warping occurs during bottom-up printing, the box dimensions, corner flatness and lid closure can all be affected.
A brim (a skirt-like adhesion aid) can help improve bottom-edge adhesion for some models; the actual effect depends on model shape, print surface and process conditions. Keeping PP prints cooling evenly also helps reduce deformation from uneven shrinkage.
3. Adjust the Seam Gap Based on the Physical Part
The mating gap between lid and body affects closure smoothness, snap assembly and overall appearance.
In design you can set an initial gap first, then actually print to check the fit. Different printers, model sizes, structural forms and print conditions all affect final dimensions, so a single gap value should not be treated as a fixed standard for all packaging prototypes.
Snap structures must also be checked separately for engagement position, contact surface and removal directionâdon’t adjust only the overall lid size while ignoring local interference.
4. Surface Effect and Transparency
FDM prints usually show visible layer lines and a certain surface texture, which suits verifying packaging structure, dimensions and some frosted feel.
For packaging that needs high transparency or near-optical-grade appearance, FDM printing usually cannot directly match the visual effect of transparent injection-molded packaging. Layer height, print orientation and post-processing can change the surface look, but cannot guarantee the same effect as a transparent molded part.
During appearance review, the physical sample and the 3D rendering can be shown together, presenting the structural design and the expected production appearance separately.
5. Verify Internal Positioning and Pick-and-Place Experience
A packaging prototype is not just an outer shell; it can also have internal components such as liners, cushioning structures, positioning posts and locating features.
Printing these structures lets you check whether the product sits stably and is positioned accurately, and whether there is interference when placing or removing it. For packaging that must display the product, you can also compare how different internal layouts affect the overall visual effect.
Making several samples of the same design also makes it easy to compare dimensional and assembly consistency between samples and to collect feedback from different reviewers.
4. How to Bridge from 3D Printing Prototype to Mass Production?
3D printing suits rapid design changes, while injection molding suits many plastic packaging products needing high-volume, stable repeat production. The two processes play different roles in the packaging development flow.
1. Turn Prototype Verification Results into Structural Design Basis
Once the prototype’s opening feel, snap position and overall dimensions meet expectations, you can organize the verified structural parametersâsuch as wall thickness, snap-arm dimensions, hinge geometry and mating gap.
This information can serve as a reference for later structural optimization. Entering the injection-molding design stage, you must also consider process factors such as demolding direction, draft angle, mold structure, material flow and cooling shrinkage.
2. Re-evaluate Living Hinges and Snaps With Mass-Production Process
PP prints and PP injection-molded parts use the same class of base polymer, but that does not mean their mechanical performance is identical.
FDM prints have an interlayer structure, while molded parts have different forming characteristics. So a printed prototype suits verifying basic geometric relationships and initial handling experience; before mass production, key structures must be re-evaluated with the injection-molding process.
For living hinges and elastic snaps, pay special attention to how the forming method affects bending performance and long-term durability.
3. Consider Surface Treatment Based on Packaging Use
If the packaging will be printed, labeled or painted, you must also consider PP’s surface properties.
PP has low surface energy, so conventional adhesives, inks and coatings may not achieve ideal adhesion. The actual solution may involve special adhesives, primers or surface-treatment processes, depending on the packaging material, decoration method and usage requirements.
At the prototype stage you can first verify label positions, print layout and visual effect, then finalize the surface-treatment plan with the mass-production process.
4. Choose the Production Method Based on Quantity and Use
For designs that change structure frequently, 3D printing reduces upfront tooling investment; once the design is stable and volumes rise, injection molding is usually better for efficient repeat production.
Whether to keep using 3D printing in the small-batch stage depends on product quantity, unit cost, delivery cycle, appearance requirements and dimensional consistency. For some customized or low-volume packaging, printed parts can also have real application value.
Summary
3D printing suits verifying the structural design of flip-top boxes, snap boxes and integrally molded packaging, and especially helps developers check opening feel, snap force, lid seam and internal positioning early.
PP’s toughness makes it worth trying for structures like living hinges and elastic snaps. By adjusting geometry, print orientation and mating gap, you can compare the actual performance of different schemes.
From prototype to mass production, printed samples provide a basis for structural optimization, while the injection-molding process, material behavior and durability of key parts must be evaluated against production conditions. Combining rapid prototype verification with mass-production process design reduces design rework and makes packaging development more efficient.
Related Reading
- Can PP Make Living Hinges? Printing One-Piece Living Hinges with POLIVE PPpro™
- How to Prevent PP Warping? How to Choose Between Brim, Raft, and Skirt
- How should you choose between 3D printing for prototyping, mold making, and small-batch production?
- Are PP Prints Dimensionally Accurate? Shrinkage Compensation and Tolerance Control
- Can 3D Printing Handle Small-Batch Production? How to Ensure Consistent Printed Parts
包装开发早期最该验证什么?
不只是外观,而是开合手感、卡扣力度、盒盖配合和内部定位。这些用 3D 打印原型迭代最快。
PP 打印包装原型强在哪?
抗疲劳、能做一体式活铰链和卡扣,翻盖盒可以一次成型,省掉装配;韧性好,反复开合不易脆断。
从原型走向量产要注意什么?
打印件和注塑件的收缩、公差、壁厚表现不同,原型验证的是结构和手感,量产还要按工艺重新开模校核,别直接照搬尺寸。
打印这类薄壁大底件怎么防翘边?
不加热床、不封箱,空调房开放散热;首层裙边加 PPLOCK26811,直角改圆角、底部接触面加大、壁厚均匀,必要时加老鼠耳朵。