How to Remove PP Prints from the Build Plate? Demolding Tips and Plate Protection
How to Remove PP Prints from the Build Plate?
When removing PP prints, prioritize letting the build platecool down naturally before demolding.
After printing finishes, as the temperature of the build plate and the print drops, the material shrinks to some extent, and the adhesion between some prints and the plate gradually decreases. For some small parts, they may come off fairly easily once cooled.
If it still will not come off after cooling, choose a suitable auxiliary tool based on the plate type and the condition of the part.
What matters most is:
Do not pry hard directly just because the part is firmly stuck.
Incorrect removal methods may not only damage the print but also scratch the plate or tear the PP film.
Why Should You Be Especially Careful When Removing PP Prints?
Stable plate adhesion is important for improving print success rates, but prints with strong adhesion can also cause some problems during removal.
These mainly fall into the following three categories.
1. Plate scratches
If you use a metal scraper, an overly steep blade angle or downward force may scratch the surface of glass, PEI, or PP-type plates.
2. Print damage
If you forcibly pry up from a corner, the bottom of the print may crack locally.
For thin-walled parts, slender parts, or models with uneven wall thickness, deformation may also occur due to uneven force.
3. Plate film damage
If you use a film-type plate, excessive local prying force may not only remove the print but also lift the film along with it.
Therefore, when removing a print, you need to consider both:
whether the print can be removed intact, and whether the plate can continue to be used.
Several Methods for Removing PP Prints
1. Natural cooling demolding â try first
This is the method most worth trying first.
After printing is complete, do not immediately use tools to force the part off. Let the build plate cool naturally first.
As the temperature drops, the thermal shrinkage between the print and the plate may gradually weaken the adhesion.
For some small-sized parts, after cooling you may only need to gently wiggle the edge for them to detach from the plate.
If the plate itself supports being removed for separate cooling, you can also set the whole plate aside for a while to let the temperature drop more evenly.
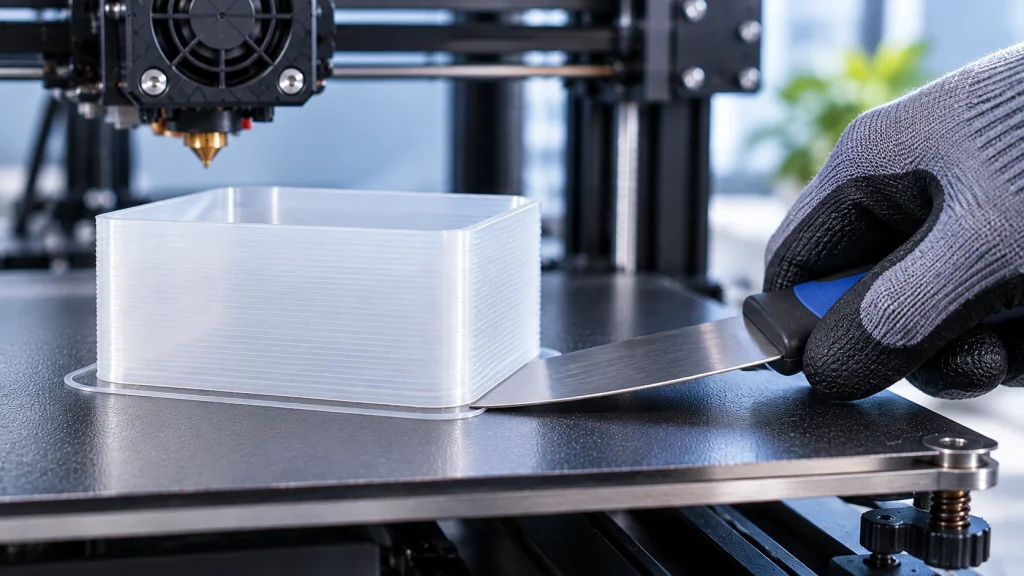
2. Flat push with a scraper
If the print remains firmly attached after the plate cools, you can use a thin-blade scraper or a dedicated demolding tool.
What matters most here isthe angle at which the tool is used.
Recommendations:
- Keep the blade as close to the plate as possible;
- Enter gradually from the edge of the print;
- Push forward slowly;
- You can combine this with gentle side-to-side rocking;
- If necessary, loosen it gradually from multiple directions.
Not recommended:
- Letting the blade tip dig down into the plate;
- Prying straight up from a corner;
- Using a great deal of force to pry it open in one go.
For parts that are firmly adhered,gradually expanding the loosened areais usually easier to control than concentrating force on a single point.
3. Using the plate’s own structure
Some build plates are themselves designed with structures that make demolding easier.
For example, if you usea flexible steel plate, you can, where the plate structure permits, separate the print from the surface by gently flexing the steel plate.
This method does not require inserting a metal tool directly between the print and the plate, so it can reduce mechanical damage to the plate surface.
However, note the following:
Flexible steel plates are not suitable for all build plates; before use, confirm whether the plate model and structure support flex demolding.
4. For stubbornly stuck parts, continue cooling first
If the print is still very difficult to remove, do not increase force immediately.
You can let the plate continue to cool, then try again.
If you use other auxiliary methods, you also need to judge whether they are suitable based on the plate material and equipment structure. For example, some plates can help with demolding by slightly changing the plate shape, but the same method should not be applied directly to all plates.
For operations involving liquids or cleaning agents, also pay special attention to equipment safetyâavoid liquid entering electronic components, and make sure the plate is completely dry before starting the next print.
Why Not Yank It Off by Hand?
PP itself has a certain degree of toughness.
When the adhesion between the print and the plate is still strong, if you pull hard by hand, the part may suddenly detach and produce a noticeable rebound.
This can not only lead to:
- Edge damage to the print;
- Deformation of thin-walled structures;
- Sudden local pulling force on the plate or film;
- Loss of control of the tool or hand.
Therefore, if a tool is needed, it is best to let the tool do most of the demolding work rather than simply increasing hand force.
Removal Approaches for Different Plates
Demolding methods differ depending on the plate material.
Glass plate
Glass surfaces are fairly hard, but if metal tools are used improperly, scratches or surface damage can still occur.
When using a scraper, keep the angle as flat as possible and avoid pressing down with the blade tip.
PEI plate
PEI plates usually require removal based on the specific surface type and the manufacturer’s recommendations.
If the print is firmly adhered, do not use excessive prying force, to avoid damaging the surface.
PP film or PP board
If you use a PP-type plate, when removing the print you need to pay attention to boththe integrity of the print and the plate surface.
Especially for film plates, avoid concentrating a large prying force on a small area, otherwise the film may lift or tear locally.
a flexible steel plate
If the printer supports a flexible steel plate, you can prioritize flexing the plate to help the print detach.
This is usually gentler than directly inserting a hard metal tool under the part.
How to Protect the Build Plate?
Besides mastering removal methods, daily plate maintenance is equally important.
Keep the scraper angle gentle
If you use a scraper, keep the blade close to the plate.
Do not pry hard downward with the blade tip.
Address plate damage promptly
If the plate shows obvious scratches, damage, or changes in surface structure, you need to decideâbased on the plate typeâwhether to flip it, change the used area, or replace it.
For double-sided plates, you can also spread long-term wear by changing the used area.
Handle film damage promptly
If the PP film already shows obvious breaks or lifted edges, it should be dealt with or replaced promptly.
The damaged area may further affect first-layer adhesion and surface flatness in subsequent prints.
Keep the plate clean
After removal, if glue, material debris, or other contaminants remain on the plate, clean them off promptly.
Residues on the plate surface may affect the first-layer condition of the next print.
At the same time, the cleaning agent used should be chosen based on the plate material and the manufacturer’s recommendations, to avoid damaging the plate surface through improper cleaning.
Form a Fixed Removal Workflow
If you print PP frequently, you can standardize the removal process:
Step 1: Printing finished
Do not pry hard immediately.
↓
Step 2: Wait for the plate to cool naturally
Let the temperature of the print and plate drop gradually.
↓
Step 3: Try gentle loosening
Observe whether the print has begun to separate from the plate.
↓
Step 4: Use a demolding tool if necessary
Keep the blade flat against the plate and push slowly from the edge.
↓
Step 5: Still cannot be removed
Continue cooling, and check whether structures such as a flexible plate can help with demolding.
↓
Step 6: Inspect the plate
After removal, check whether the plate has scratches, film damage, or material residue.
This turns “removal” from an operation prone to excessive force into a more controllable process.
Summary
Demolding PP prints is not simply a contest of strength, but rather a matter of findinga balance between print adhesion and demolding difficulty.
A few key points:
- Natural cooling is the preferred demolding method to try first.
- If it remains firmly adhered after cooling, then use a suitable demolding tool.
- Keep the scraper as flat as possible against the plate, and avoid prying hard downward with the blade tip.
- For flexible steel plates, you can use plate flexing to help the print detach.
- Do not yank by hand or concentrate excessive force on a single corner.
- Different plates require different demolding methods.
- After removal, inspect the plate promptly to prevent scratches, film damage, and residues from affecting the next print.
For POLIVE PPpro™, the ideal printing state is not only about letting parts adhere stably, but also keeping the demolding process after printing controllable. The balance among plate material, first-layer parameters, and printing temperature directly affects the final removal experience.
How Do You Safely Remove a PP Part from the Build Plate?
Let the build plate cool naturally first — as PP shrinks on cooling, adhesion drops by itself. Then push a thin scraper in flat, or gently flex a flexible build plate. Do not pull the part off by force.
Why Not Just Pull It Off by Hand?
It is easy to scratch the plate, tear its coating, or rip the bottom layers or thin walls of the part. PP is tough, so when you pry hard the part usually deforms first and the plate film gets damaged first.
How Do You Clean the Build Plate After Using PPLOCK26811?
One coat is already good for several consecutive prints, so there is no need to reapply every time. When cleaning is due, wipe it off with alcohol, let it dry and apply a thin fresh coat. That is exactly where it saves more work than repeatedly sticking down tape.
How Do You Set Up a Consistent Removal Routine?
After printing, let the plate cool naturally → push the scraper in flat, starting from the outside of the brim → check the plate coating once the part is off → wipe away residue with alcohol → print directly next time. Fix the sequence and both the plate and the part take less abuse.
Related Reading
- What Print Bed Should Be Used for PP 3D Printing? A Comparison of Common Bed Materials
- How to Prevent PP Warping? How to Choose Between Brim, Raft, and Skirt
- How to Post-Process PP Prints? Sanding, Bonding, Painting — PP’s Finishing Approach Differs from Other Materials
- How Good Is the Surface Quality of PP Prints?
- What Is PPpro? A Modified PP 3D Printing Filament That Needs No Heated Bed and Makes Living Hinges
- How Strong Are the Interlayer Bonds of PP Prints? How to Improve Z-Direction Strength